Set-up
This chapter describes the steps needed to set up a petition.
The CiviCampaign component must be enabled before you can use Petition. See the section Campaign for information about this.
Set CMS permissions
You will need to set the appropriate CMS permissions so that specific roles can sign the petition. In particular, anonymous users should be granted permission if you're planning to make the petition public.
- Go your Drupal, Joomla!, or WordPress Access Control page, which is linked from Administer > Users and Permissions > Permissions (Access Control).
- Grant the following permissions--Sign CiviCRM Petition, Profile Create, and Access all Custom Data--for the roles you require. For example, if this is to be a public petition, you must grant these permissions for anonymous users and authenticated users ("Guest" in Joomla! or "Subscriber" in WordPress).
Create two Custom Profiles
In order to create a new petition, you must create two custom profiles: one to capture the contact information of the signer, and the other to capture the responses to the petition questions. The responses to the petition questions are recorded in the activity record of type Petition for each individual who signs the petition.
- Go to Administer > Customize Data and Screens > Profiles and add a profile with fields for the contact information you want to collect, such as First Name, Last Name, and Email. You may want to make some of these fields required so you capture enough information to communicate with signers at a later date. You must collect at minimum an email address in the contact profile, because the Petition feature will send an email to the signer of the petition to prompt them to verify their email address. Only those verified email addresses can be counted.
- Go to Administer > Customize Data and Screens > Custom Fields and add a set of custom fields to capture responses to the petition questions. From the Used For drop down menu select Activities. For the Activity Type select Petition Signature.
- Under Administer > Customize Data and Screens > Profiles add a profile for the petition responses. Select Activity from the Field Name drop down menu, then select from the custom fields you created.
For both profiles, you may want to select the following settings in the Advanced Setting area:
- For Drupal user account registration option?, select the radio button for No account create option if you do not want all petition signers to have a Drupal account created.
- For What to do upon duplicate match, you can select the radio button for Allow Duplicate Contact to be Created if you don't want anonymous users to update an existing contact record's information; you will then need to periodically dedupe records.
To learn more about how to create custom field sets, see the chapter Creating Custom Fields in the Organising Your Data section. To learn about how to create a custom profile, see the Profiles chapter.
Create a New Petition
Once you have created the two profiles, you are ready to create a petition.
-
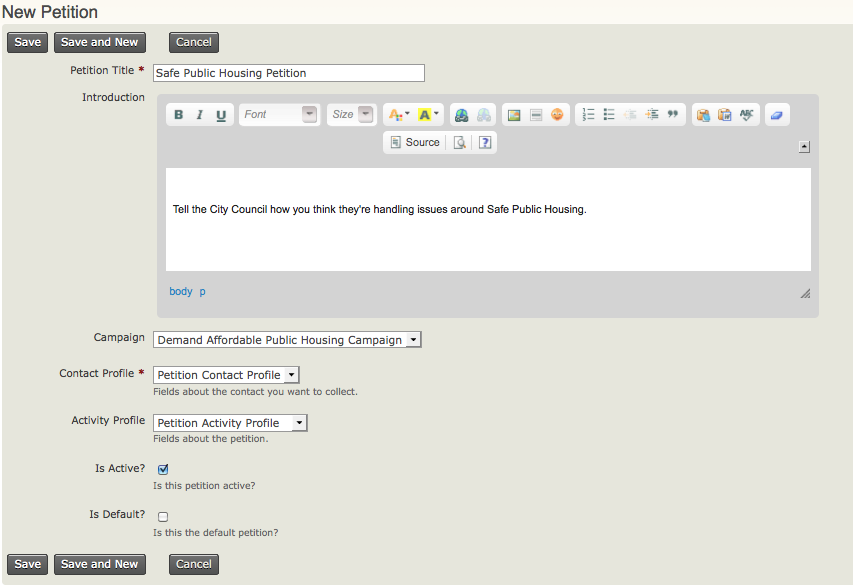
Go to Campaigns > New Petition, then enter the following information about your petition:
-
Petition Title (required): enter the name of your petition.
- Introduction: enter text describing what your petition is about. Potential signers will read this, so create a good message to encourage individuals to sign the petition.
- Campaign: if your petition is one strategy or activity of a campaign, then select the name of the campaign.
- Contact Profile (required): select the name of the profile that will collect the contact information of petition signers.
- Activity Profile: select the name of the activity profile that will collect petition responses.
- Is Active?: check this box to make your petition active.
- Is Default?: check this box to make your petition default.
1. Click Save to save the petition information.