Accounting Integration
The accounting integration feature allows you to export all the double-entry financial transactions for a batch of contributions so that you can import them into your accounting software. You can create a new accounting batch then assign existing contributions to it, or re-use a batch created during batch data entry as an accounting batch.
Use a batch created through Batch Data Entry
Batch entry of transactions is covered in Manual Entry of Contributions
After you validate and close a batch, it will appear in the accounting batch listing with a status of Closed.
Create a New Batch from Existing Transactions
Create the batch
Go to Contributions > Accounting Batches and select New Batch. This opens the batch creation screen where you define the batch parameters
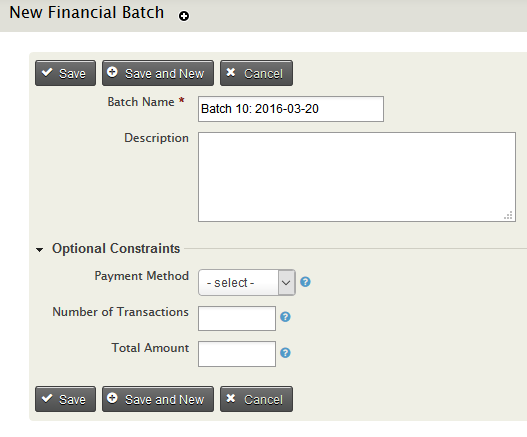
- Enter the Batch Name (required). CiviCRM will create a default Batch Name ("Batch N" + open date), which you can edit.
- You may optionally enter a Description of the Batch.
- If you want this Batch to contain only transactions paid by a specific Payment Instrument, select it from the drop down: Credit Card, Debit Card, Check, Cash, or EFT, or any custom Payment Instruments you may have set up.
- If you know in advance the number of transactions that will be in the Batch, enter it in Number of Transactions. When you close the Batch, CiviCRM will verify that you have entered the correct number. (You will have the opportunity to override the warning if they do not match.)
- If you know in advance the Total Amount of the transactions that will be in the Batch, enter it in Total Amount. When you close your Batch, CiviCRM will verify the totals entered match this number. (You will have the opportunity to override the warning if they do not match.)
- Save
You can later return to edit these parameters as long as the Batch remains open.
Assign Transactions to a Batch
After creating a new Accounting Batch or opening an existing one you will be on the transaction assignment screen.
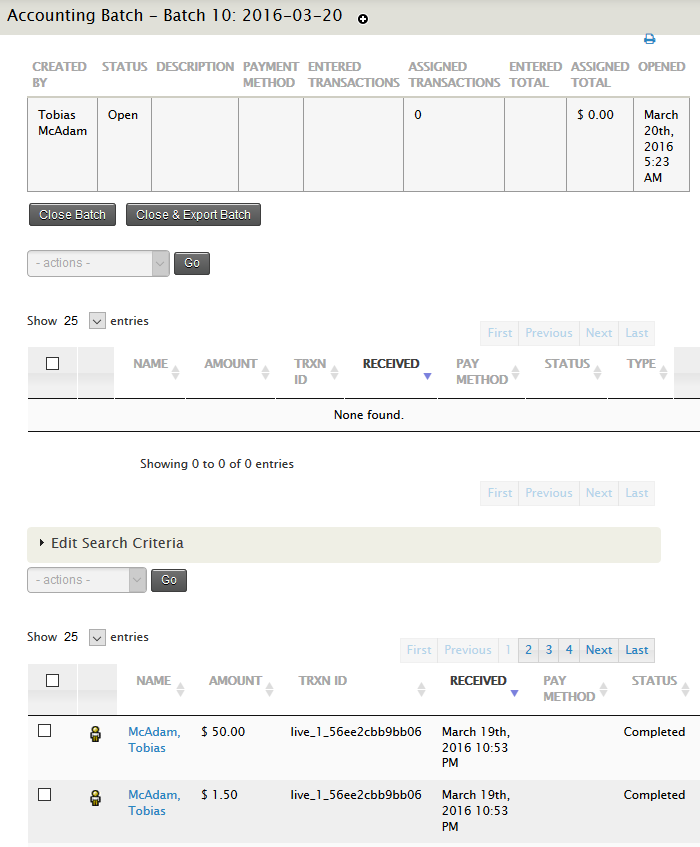
At the top of the screen the defined parameters of the Batch are displayed:
- CREATED BY
- STATUS (Open, Closed, or Exported)
- the DESCRIPTION entered when the batch was created
- the specified PAYMENT METHOD
- the number of ENTERED TRANSACTIONS
- the number of ASSIGNED TRANSACTIONS
- the ENTERED TOTAL amount of the transactions
- the ASSIGNED TOTAL amount (which will update as you assign transactions to the batch)
- the date the batch was OPENED
Below that is a list of transactions assigned to the Batch. This will be empty until you assign transactions to the Batch. There is also an action dropdown selection that will not be available until transactions are assigned to the Batch.
Next comes the Edit Search Criteria accordion. Click to open the search pane. If a Payment Instrument was selected when the Batch was created, this option will be selected by default. Specify the criteria for the contributions you want to add to the Batch.
At the bottom of the page is the search results list. You may assign a single transaction to the Batch by clicking Assign at the end of the result row. Or you may select multiple transactions and use the action menu above the results to select Assign to Batch. The transactions will be added to the assigned transaction list, and will be removed from the search results list.
View and Remove Assigned Transactions
Once you have Assigned Transactions to the batch, they will appear in the Assigned Transactions list in the middle of the page. If you need to remove transactions from the batch, select Remove at the end of a row of an individual transaction, or select multiple transactions and use the action menu above the list to select Remove from Batch.
You will also see changes to the parameters table at the top of the page, reflecting the new number and total amount of Assigned Transactions.
If you want to return and edit the batch later, simply return to the Accounting Batch main page. The batch status will remain Open.
Close and Export a Completed Batch
Once you have completed assigning the transactions, you may Close the Batch, or Close and Export it.
If you attempt to Close the Batch and your assigned number of transactions does not match the entered number of transactions, or if the assigned total transaction amount does not match the entered total amount, a "Mismatch" error message will appear. You may close the error message and return to the Batch to correct the mismatch, or you may click OK to override the error; the entered transaction number and total amount will update to match the assigned transaction number and total amount, and the Batch will be closed.
If you Close the batch without exporting it, the batch status will change to Closed. You may re-open the batch later, before exporting it, or you may export the transactions later.
If you close and Export the batch, you may choose your export format. CSV will produce a spreadsheet of comma-separated values. IIF will produce a file in Intuit Interchange Format, which is used by Intuit products such as Quickbooks to import transactions. Once the transactions are exported, the Batch status changes to Exported. An exported batch cannot be re-opened.
Searching and Acting on Batches
Go to Contributions > Accounting Batches and select Open Batches to go to the Accounting Batch main page. Here you may filter the list of displayed Batches by Status (Open, Closed, or Exported); Batch Name; the User who created it; the Payment Instrument; the entered number of transactions; and the entered total amount.
If a batch has the Status Open, select Transactions to assign or remove transactions, or select Edit to edit the Batch parameters. Under more you can choose to close, export, or delete the Batch.
If a batch has the status Closed, select Transactions to view the Assigned Transactions, or select Export to Export the Assigned Transactions to a CSV or IFF export file. Under more you can choose to re-open or delete the batch.
If a batch has the status Exported, select Transactions to view the transactions assigned to the batch; select Download to export the CSV or IIF file of assigned transactions; or select Delete to delete the batch. Once a batch is Exported it cannot be re-opened.
From the search results page, you may also take action on more than one batch. Select all the batches to be updated, and choose an option from the action dropdown menu: Re-open, Close, Export, or Delete.
Finding Transactions by Batch
From the Advanced Search Contribution pane, or from Find Contributions, you can search by Batch Name. Select a batch and the results will return all transactions stored in the Batch.