Everyday tasks
This chapter describes everyday tasks related to managing campaigns with CiviCampaign.
Managing Campaigns
The Campaign Dashboard allows you to create, configure, manage and view your campaigns. You can also manage surveys and petitions via the Campaign Dashboard (refer to the following chapters on Surveys and Petitions for specific information).
To view the Campaign Dashboard, go to Campaigns > Dashboard > Campaigns.
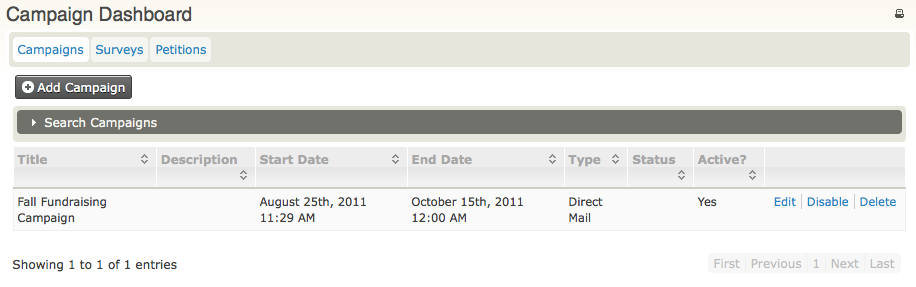
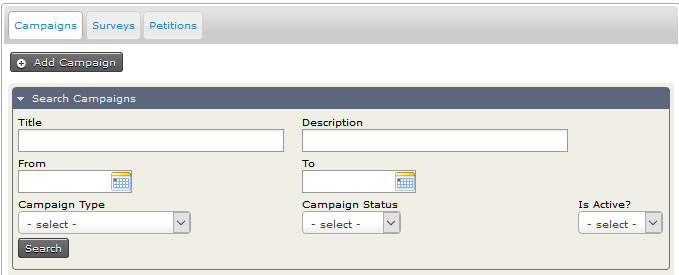
From the Campaign Dashboard, you can then Edit, Disable and Delete existing campaigns, and create new campaigns. If you have a large number of campaigns you can open the campaign search accordion to set filters to display only the campaigns you want to see a t that time.
Create a New Campaign
To create a Campaign:
-
Go to Campaign > New Campaign
-
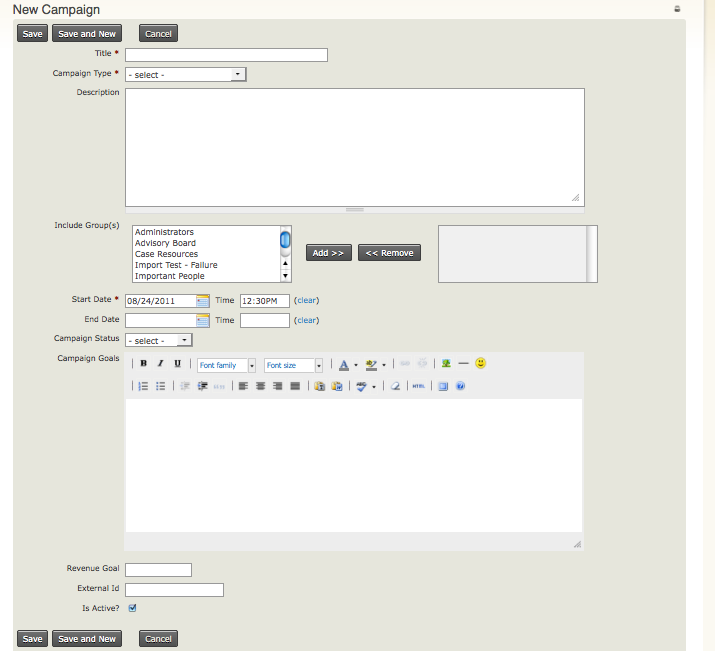
Enter information about your campaign:
- Title (required): enter a unique name that describes your campaign. It's helpful to establish a naming convention for new campaigns so they alphabetize in drop-down lists automatically and are easy to sort through when associating an activity with the campaign.
- Campaign Type (required): select the type of campaign, e.g. Constituent Engagement. To add more options to the Campaign Type drop-down list, see the previous chapter on setting up CiviCampaign.
- Description: enter text that describes your campaign.
- Include group(s): if appropriate, select the group that contains the individuals you are targeting for this campaign. To find out more about creating groups, see the chapter on Tags and Groups.
- Start Date & Time (required): enter the start date and time of the campaign
- End Date & Time: enter the end date and time of the campaign. If these fields are empty, then the campaign will be considered ongoing.
- Campaign Status: select the status of the campaign, e.g. In Progress, Planned, etc. To add more options to the Campaign Status drop-down list, see the previous chapter on setting up CiviCampaign.
- Campaign Goals: enter text that describes the goals and/or objectives of your campaign. You may also want to describe the activities you plan on conducting to meet those goals.
- Revenue Goals: if applicable, enter a number that indicates the amount you plan to raise during your campaign.
- External ID: if you want to track the campaign ID of the campaign when it existed in another database, you can enter the ID number of your legacy campaign.
- Is Active?: check the box if the campaign is an active campaign. If the campaign is inactive, then uncheck the box.
Click Save, to save the campaign.
Targeting constituents: create a group
You may want to target a specific group of individuals for all campaign activities. This is done by creating a group to target these individuals. See the chapter Tags and Groups for more information about how to create a group.
Send a mass mailing
A mass mailing to your target audience can generate interest and participation, and also be used to call for donations.
- Create the email using CiviMail. See the Email section of this book to learn more about configuring and using CiviMail.
- Select the appropriate campaign from the drop-down list when setting up the mailing.
A campaign event
Events created using CiviEvent can be associated with a campaign.
- Create and configure the event.
- Select the appropriate campaign from the drop-down list when setting up a mailing for the event.
- Send a mass email using CiviMail to your target audience using a group or groups, and ask people to register for the event.
- Again, select the name of the campaign on the mailing set-up.
- Search for individuals who have indicated they want to register for the event.
Record campaign contributions
As contributions come in, either online or offline, they can be associated with a campaign; simply select the appropriate campaign from the drop-down menu when recording the contribution.
To find out more about configuring and using CiviContribute, see the Contributions section.
Record event participation
During and after an event, organizers can record who participated by either collecting sign-in sheets and entering the participants manually, or recording who participated directly online.
Have participants write their contact information on sign-in sheets when they arrive, or if you have an internet connection at the event venue you may be able to enter participants directly into the database.
Find out more about how to record participant information for an event, see the Events section.