Upgrades
Keeping CiviCRM up-to-date helps you take advantage of new features but is critically important when security updates are issued.
In general:
- The upgrade steps are different depending on your CMS.
- The upgrade steps are the same no matter which versions of CiviCRM you are moving from and to (with some exceptions)
- The upgrade steps are the same for small upgrades (e.g. 5.49.0 to 5.49.1) as they are for large upgrades (4.7.31 to 5.49.0).
- You can make big jumps in one upgrade (e.g. 4.7.20 to 5.49.0) without needing to apply all the upgrades in between.
- If you are starting from a version prior to 4.5.9 you should upgrade to 4.7 as an interim step, as the latest version does not contain upgrade code going back that far.
This page provides some of the steps to do before and after an upgrade, but leaves the bulk of the steps up to the CMS specific pages in this chapter.
Before upgrading
Before upgrading CiviCRM, follow these steps to ensure the process goes a smoothly as possible.
-
Ensure that your system meets all the requirements for the CiviCRM version to which you are upgrading.
-
Check for any version-specific upgrade instructions.
-
Backup your site. Very important!
-
Use your backup to create a copy of your site (directories and database), and ensure that this copied site works correctly. This step is important both for (a) testing that your backup/restore procedure works, and (b) allowing you to test the upgrade in a low-stakes environment.
-
Test the upgrade process on your copied site to ensure that it succeeds.
-
Troubleshoot any upgrade problems.
-
Once you have performed a successful test upgrade, then apply the same steps on your live site.
Upgrading
These steps vary depending on your CMS. Find the appropriate page in this chapter and follow the steps within it.
After upgrading
Flush caches
If you ran the upgrade on the command-line, you will need to flush caches by running cv flush. The upgrade web interface will take care of this automatically.
Evaluate new permissions
The CiviCRM post-upgrade messages should alert you if new CMS permissions are added. If so, review and configure the CMS permissions.
Update resource settings
If you are running the upgrade in a different directory from your previous version you may need to update the configured CiviCRM Resource URL and Extension Resource URL settings. (Missing icons and images, as well as problems with javascript functions and stylesheets are all symptoms indicating that these settings need to be updated.)
- Go to Administer CiviCRM » System Settings » Resource URLs
- Refer to the field help on that screen for instructions.
Updating system workflow message templates
System workflow message templates are templates for the various emails that CiviCRM sends regularly (e.g. contribution receipts, event registration confirmations). CiviCRM occasionally makes changes to these templates in new releases. But users can also make changes to these templates. If a user has customized a template, then CiviCRM will stop applying updates to that template during version upgrades. This behavior is good because it preserves your customizations, but bad because you'll miss out on template updates from CiviCRM core (which are sometimes important).
For each version upgrade you perform, follow these steps to merge your template customizations with CiviCRM's template changes.
-
Determine your currently-installed CiviCRM version (after your upgrade) and your previously-installed CiviCRM version (before your upgrade).
-
Assess the changes made to your templates — both by your users and by the CiviCRM upgrade.
The following two steps can be done in either order. If you have relatively few user customizations, then look through them first. Conversely, if your version upgrade spans relatively few releases, then look through CiviCRM's changes first.
-
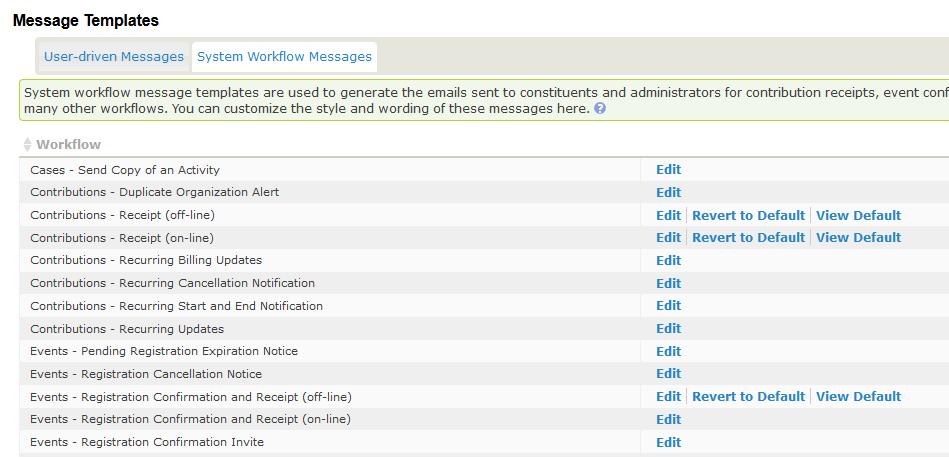
See which templates users have customized.
Navigate to Administer > Communication > Message Templates and click the System Workflow Message tab.
Identify any customized templates by looking for rows which display "Revert to default" and "View Default" links.
-
See which templates CiviCRM has changed.
-
-
Identify templates which have been changed by both users and CiviCRM. (Mostly commonly, you won't have any such templates and you can stop here!)
For each of these templates with conflicting changes, perform the remaining steps.
Note
Each message template has two separate pieces of text — the HTML version and the text version. Take note of conflicting changes to each of these types, as you'll need to process them separately.
-
Let's pause here and explain a little theory...
When a piece of text is changed in two divergent ways, there are three versions of this text which matter: (A) the "base" version before any changes were made, (B) the version changed by one party (e.g. users), and (C) the version changed by another party (e.g. CiviCRM core).
Our goal here is to merge (B) and (C) to produce a new version which includes all the changes.
In the best case scenario, the changes in (B) and (C) were made to completely independent parts of the text. In this case, the merge process is straightforward and can be done automatically with the right software. (But note that we need to have the (A) version to tell if this scenario exists.)
In a less ideal scenario, the changes in (B) and (C) targeted the exact same text, changing it in different ways. Here, there are said to be "merge conflicts".
-
Let's use a 3-way diff/merge application to merge the changes. KDiff3 is a cross-platform application that does exactly this. Install KDiff3 now, or continue by using a similar application of your choice.
-
Find the base version, (A), of the template before any changes were made by users or your CiviCRM upgrade. Again, look in the
CRM/Upgradedirectory. Find the most recent version of the template before the CiviCRM version that you had prior to the upgrade. -
Find the version of the template, (B), changed by your users.
Within the Message Templates screen click Edit next to the customized template.
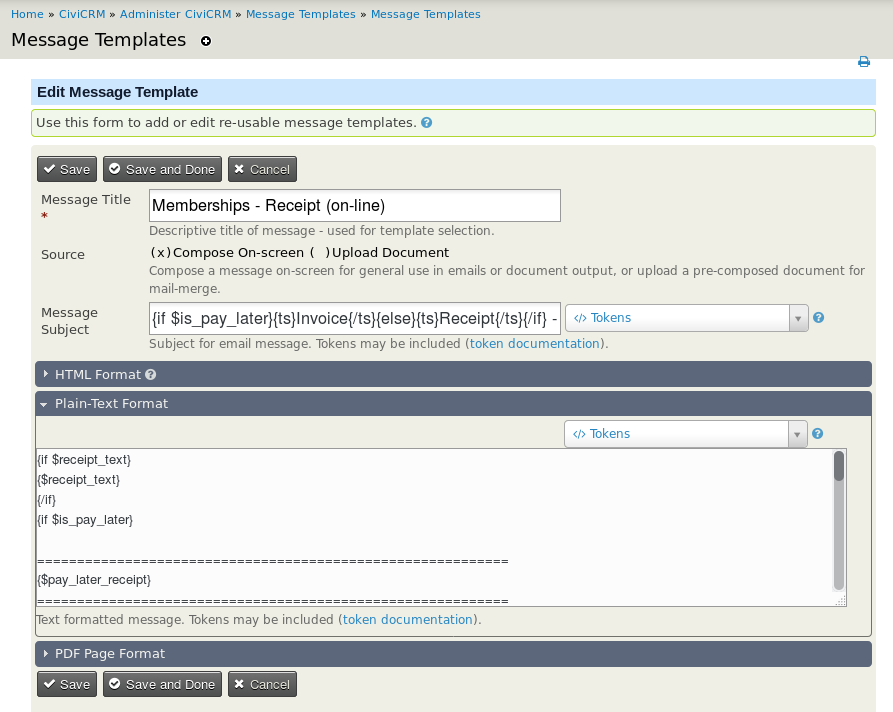
Copy the text from this template into a temporary file on your computer.
-
Find the version of the template, (C), changed by your CiviCRM upgrade by looking in the
CRM/Upgradedirectory, as before. -
Load all three files into your diff/merge program.
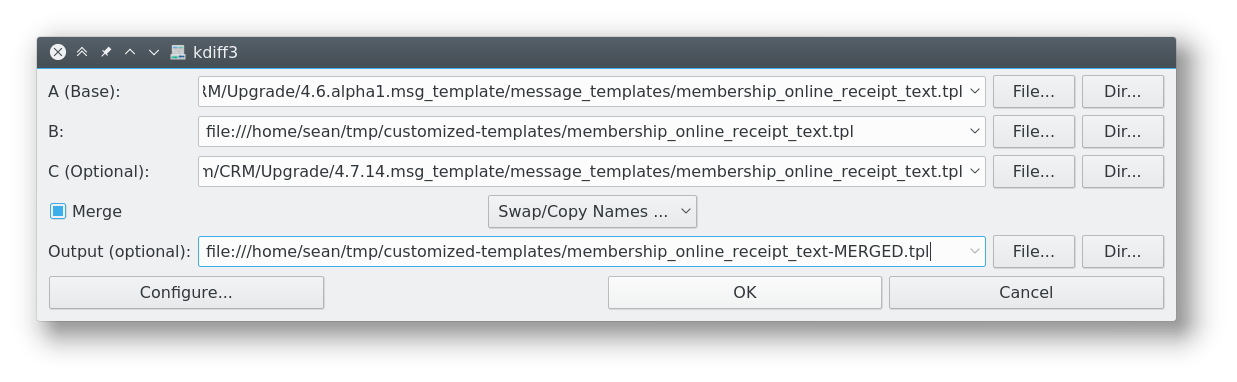
In KDiff3, it's helpful to check the Merge box and specify an output file, as shown in the screenshot above.
-
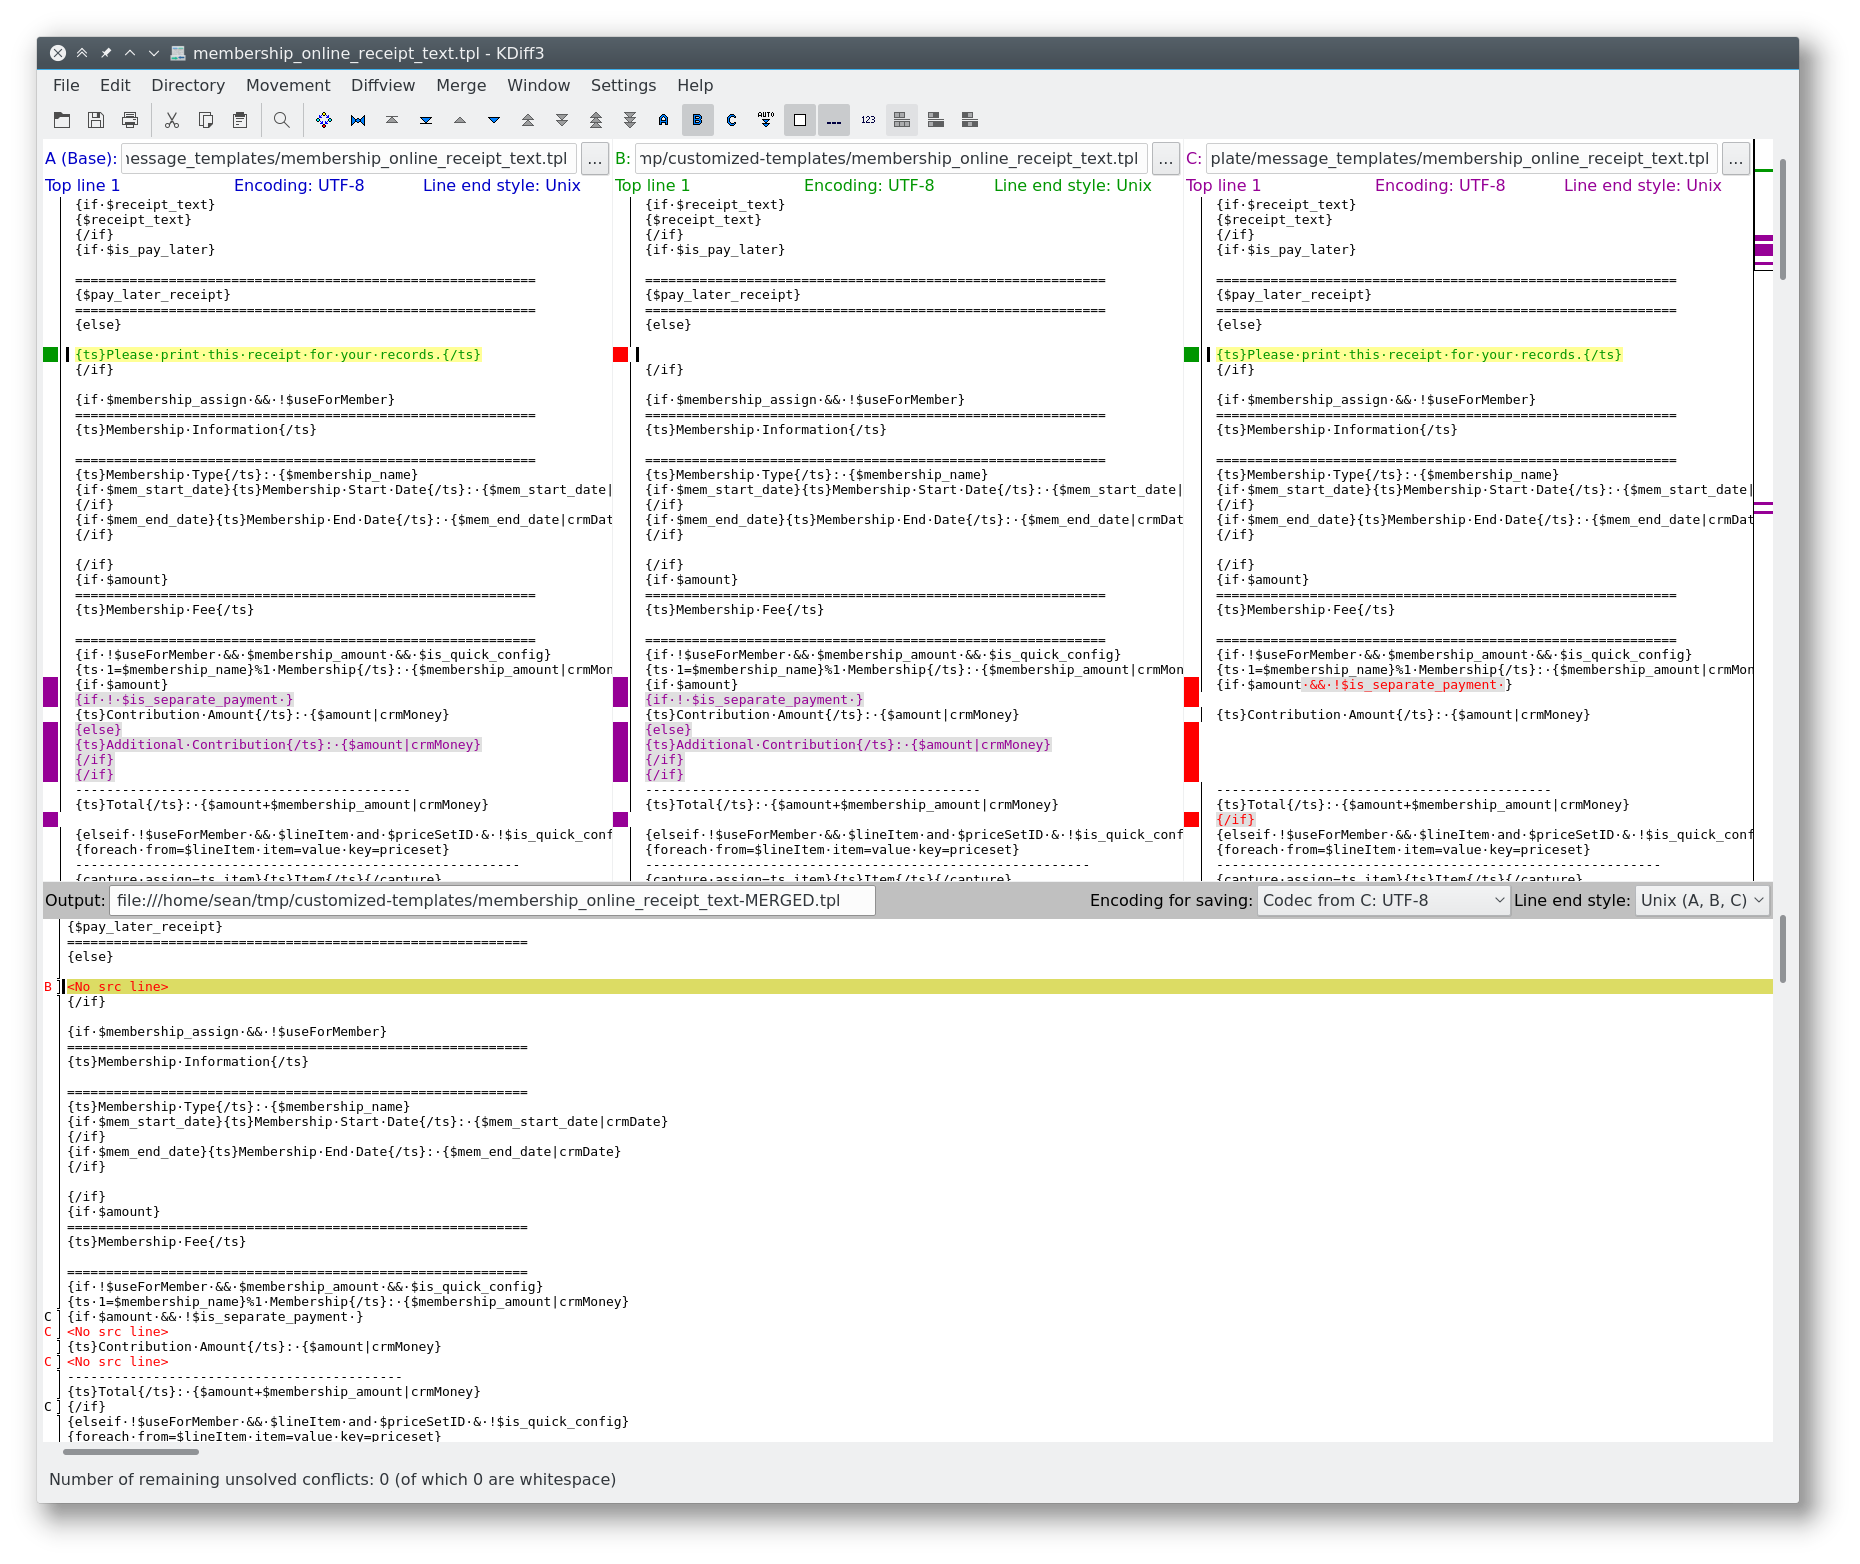
In most cases, the diff/merge application will be able to automatically merge changes from (B) and (C). However in some rare cases you'll need to use the diff/merge program to manually resolve merge conflicts.
When you're done merging changes (either automatically or manually), you'll have an output which you can save to a separate file.
-
Finally, copy the output of the merge back into Message Template screen within CiviCRM, and save.