Moneris Configuration Guide
Overview
Moneris is a Canadian transaction processor, working with most of the major credit cards and now direct payment cards as well. There is a US version of the Moneris API out there, but it hasn't been implemented yet.
There was an implementation of a CiviCRM plugin for Moneris in early versions of CiviCRM, but due to licensing issues, it was removed.
Instead, there are now two extensions available that allow you to use Moneris, one using a "post" method, and one using a "hosted pay page".
Post
Read the extension's README. It should only be used for one-time credit card payments in Canada.
Hosted Pay Page
Here is a brief description of how you go about setting up Moneris Hosted to work with CiviCRM 4.x
-
Install the Moneris extension.
-
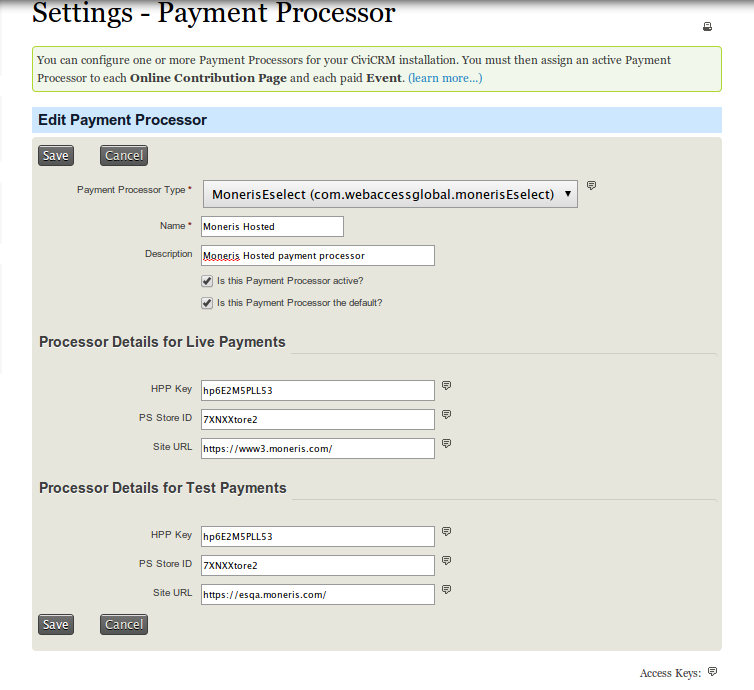
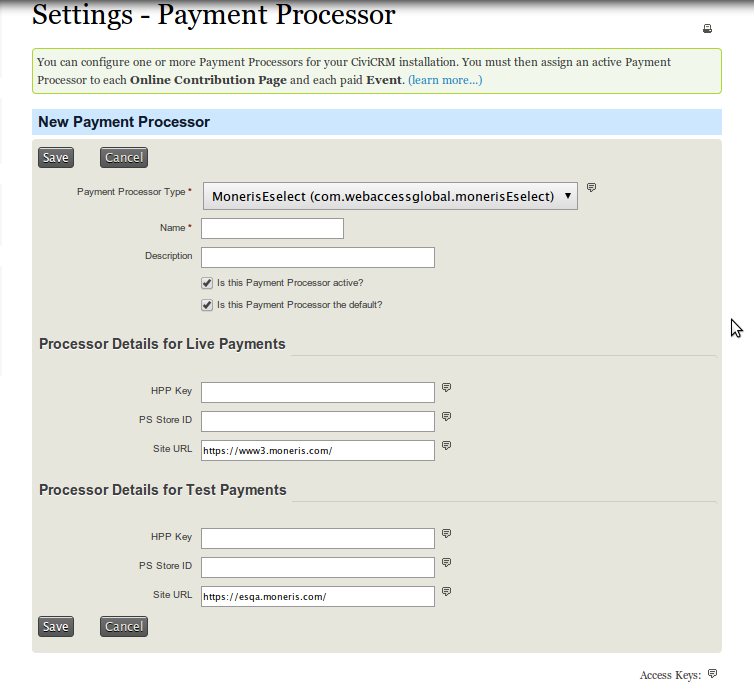
You should now be able to view the following screen when you set up extension for Moneris Hosted Payment Processor.
-
The next thing is to configure Moneris eSELECT Plus Hosted Paypage . The following configuration steps are required under your Moneris eSELECT Plus merchant account.Please ensure you have your merchant account set up on moneris before continuing.
-
Log into the Merchant Resource Center: Developement Production
Before you can send a transaction to the Hosted Paypage you will need to configure several settings through the eSELECTplus Merchant Resource Centre (MRC). To log into the MRC test environment go to https://esqa.moneris.com/mpg and use one of the following login IDs.
Store ID Username Password store1 demouser password store2 demouser password store3 demouser password -
Navigate to Admin -> Hosted Config
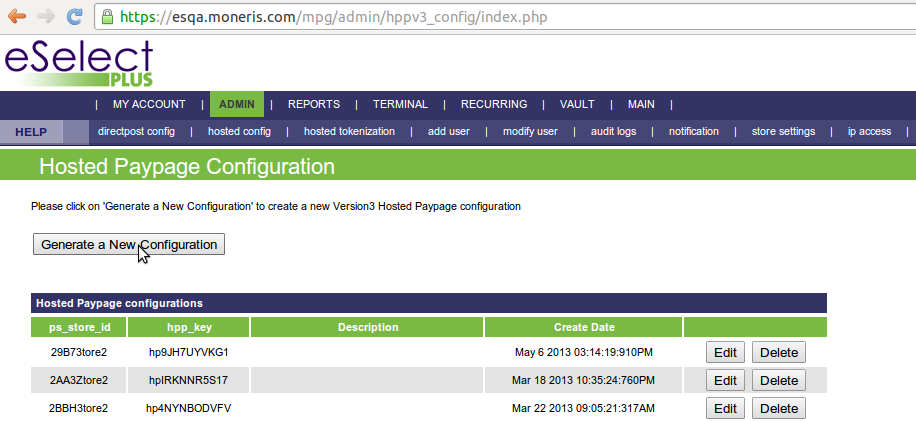
Once you have successfully logged in, click on the “ADMIN” menu item on the left and then in the submenu that appears click on “HOSTED CONFIG”.
To create a new Hosted Paypage configuration, click on “Generate a New Configuration”. You will be assigned a Hosted Paypage ID (ps_store_id). This is the identifier for this unique configuration. You will also be assigned a Hosted Paypage Token (hpp_key). The Hosted Paypage ID and Token are sent as part of the transaction request to securely identify your store and the specific configuration.
-
Set Transaction Type to Purchase (default).
- Under Payment Methods, ensure Credit Cards is enabled, all others disabled.
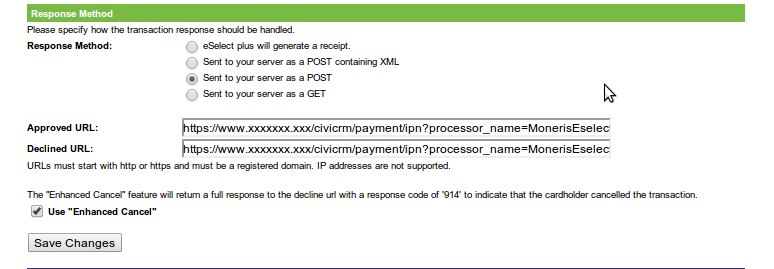
- Set Response Method to Sent to your server as a POST.
-
Set Approved URL and Declined URL to: http://example.org/civicrm/payment/ipn?processor_name=MonerisEselect
-
Choose "Use Enhanced Cancel" if you want to return a full response to decline url.
-
Click the Save Changes button.
- Click the Configuration Appearance button under Paypage Appearance.
-
Set Cancel Button Text:

-
Click the Save Appearance Settings button then Return to main configuration.
- Enable Return the txn_number. This field is used to perform follow-ons and leave all others disabled.
- Click the Save Response Settings button then Return to main configuration.
- Click the Configuration Security button under Security Features.
-
Check Enable Transaction Verification and select Displayed as xml on our server.

Response URL : http://example.org/civicrm/payment/ipn?processor_name=MonerisEselect
-
Click the Save Verification Settings button then Return to main configuration.
-
-
The Site URLs namely Production Test serve as a means of communication between CiviCRM and Moneris Hosted. Your CiviCRM Payment Processor screen should look something like this: