Configuring the Extended Contact Manager extension (XCM)
After the installation of the Twingle API extension, various configuration steps must be carried out so that the connection functions smoothly. Twingle API depends on the Extended Contact Manager (XCM) extension.
Taking over contact data using the Twingle API means that they may produce duplicates in your CiviCRM contact management. Before contacts are added or updated in CiviCRM a data check should take place to avoid this problem. This data check is handled by the Extended Contact Manager (XCM) extension. This extension must be configured accordingly for use with Twingle by defining a corresponding profile.
Creating an XCM Profile
Your first task regarding the Extended Contact Manager extension (XCM) configuration will be to create an XCM profile to be used for the Twingle API. This works best if you copy the Default profile.
-
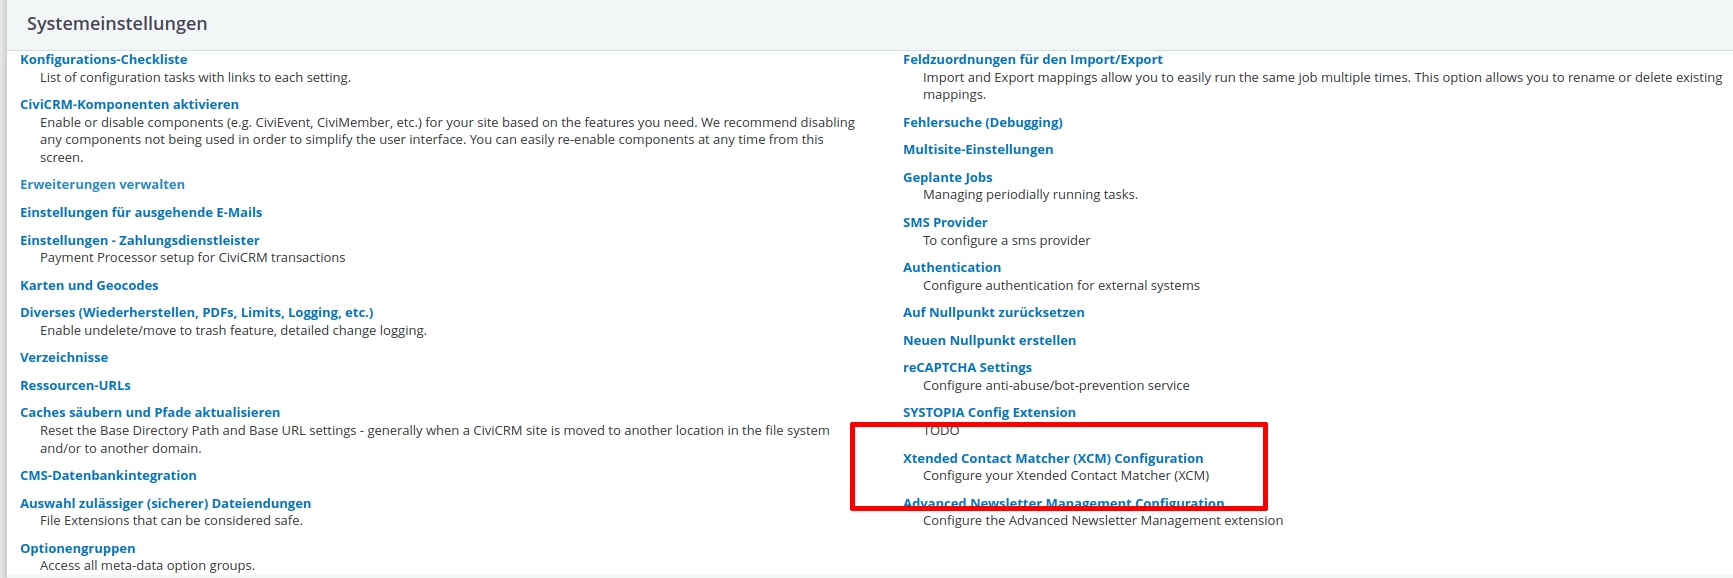
In CiviCRM, go to Administer.
-
Select Xtended Contact Matcher (XCM) Configuration in the System Settings section.
-
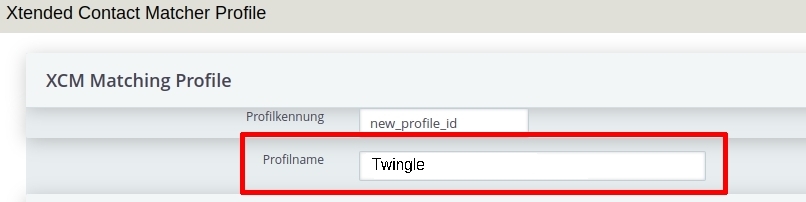
Click on Copy in the Default profile.
-
Rename the new profile with Twingle in the Profile name field.
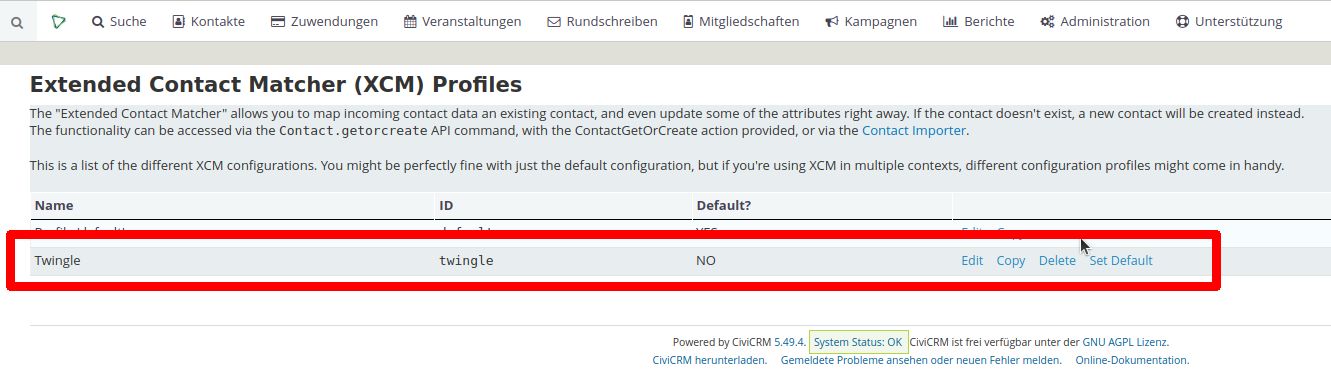
- Click Save at the bottom of this window. In the Profiles overview you can find your new Twingle profile.
Set up the Extended Contact Manager extension
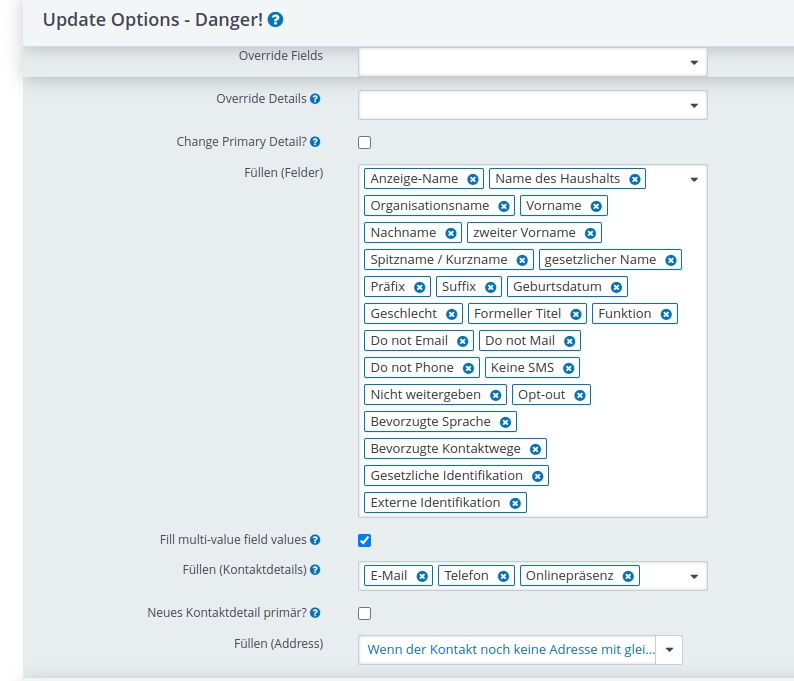
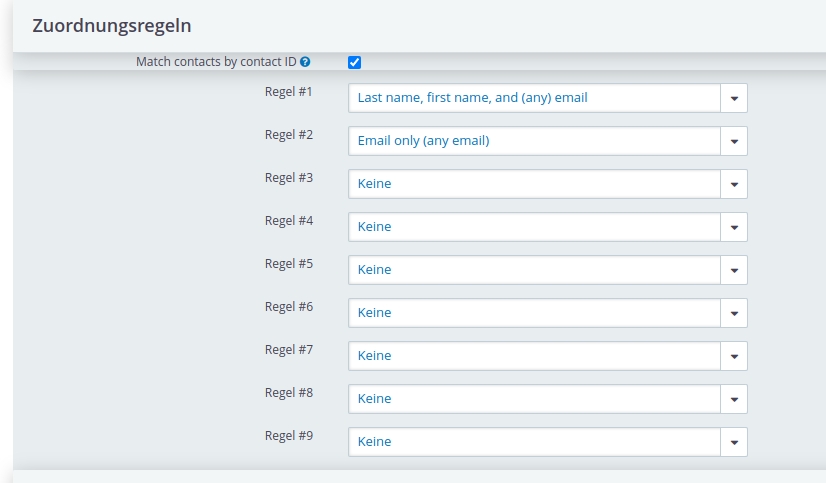
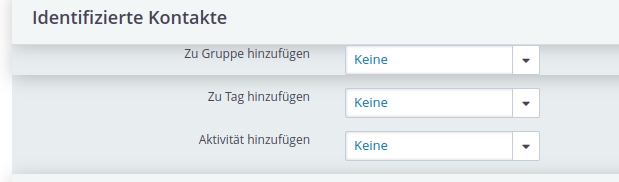
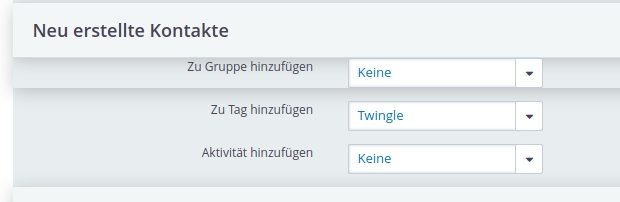
After you have created the XCM profile, you must enter the configuration settings for the Twingle connection to CiviCRM in this profile. Generally, you will find a description of all the settings in the Extended Contact Manager (XCM) documentation.
Here you will find as support screenshots of the various sections of the Extended Contact Manager extension (XCM). The settings are only an example. Please adapt the settings to your individual requirements or environnement.
General section

Update section
Assignment rules section
Identified contacts section
New contact section
Duplicate section

Difference Handling section
