Introduction to Expenses
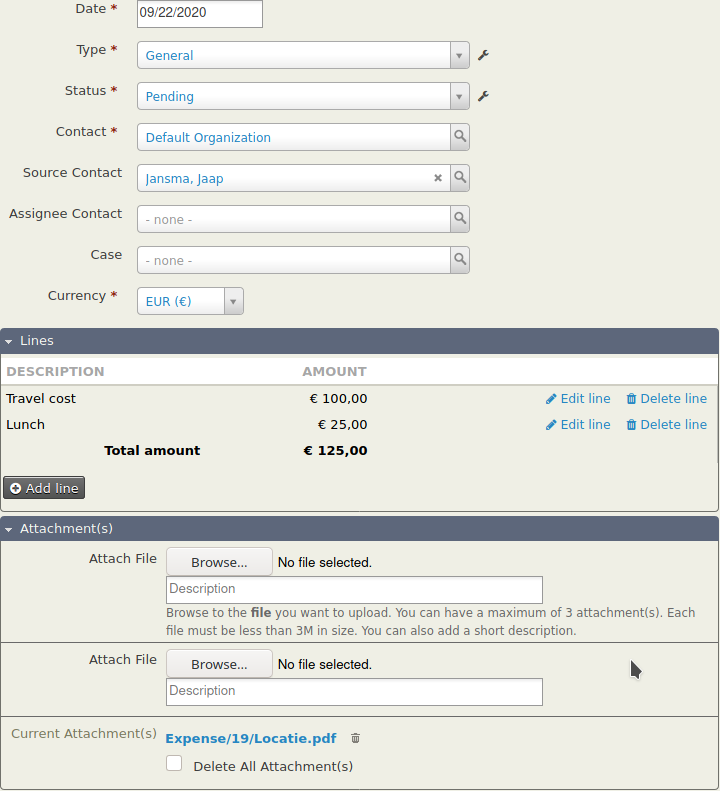
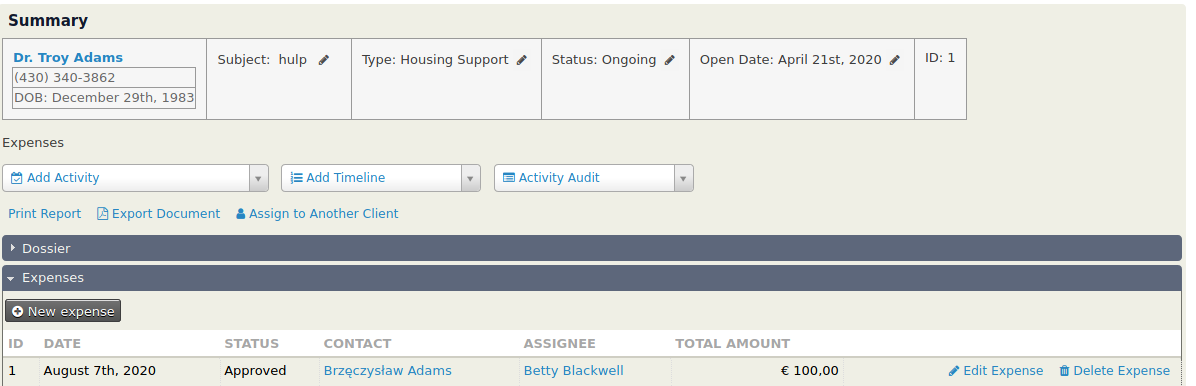
The expense extension is useful for recording expenses in CiviCRM. Below is a screenshot of an expense.
 !
!
An expense exists of the following:
- The Date of the expense.
- The Type of the expense. The extension comes with one type General. In addition to this type you can add your own type(s).
- The status of the expense. Which is either: Draft, Pending, Approved or Rejected.
- The contact which is the expense belongs to.
- The source contact which is the contact who submitted the expense.
- The assignee contact which is the contact who needs to approve this expense.
- The Case to which this expense belong.
- The Currency of this expense.
- The line(s). An expense has one or more line items. In the example above we created an expense for both travel costs as for lunch.
- Attachments which could be the receipt(s) belonging to this expense.
Note
You can customize the expense types and expenses statuses to your own needs. Both are an option group, to add, rename an expense type or expense status go to Administer then System Settings and then Option Groups. There is an option group for expense types and one for expense statuses.
Custom
You can attach custom fields to expenses or to certain expense types. To add a custom field you first have to add a custom group under Administer then Customize Data and Screens and then Custom Fields. You can also attach custom fields to an expense line.
Difference between expense and a contribution
The difference between an expense and a contribution in CiviCRM is that a contribution deals mostly with money donated or paid to your organisation. An expense is a lot simpler and deals with the situation when your staff or volunteers need to be able to declare expenses they made and which you will pay out.
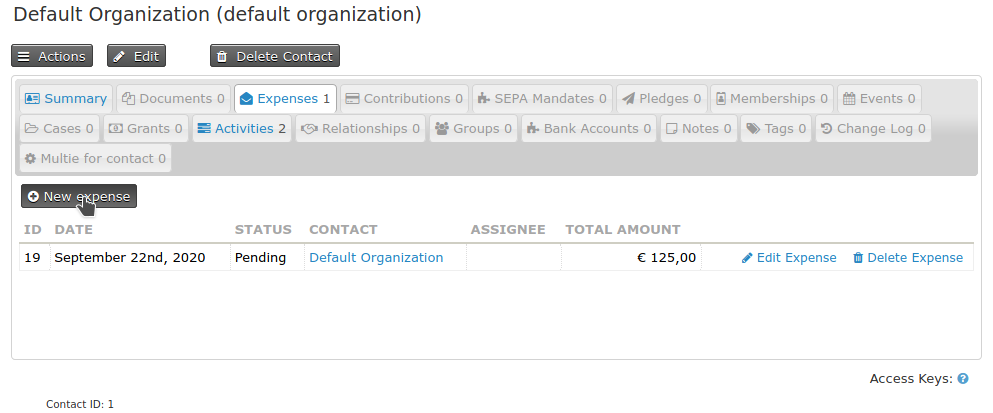
How to add an expense
Go to a contact card and click on Expenses and then on New expense.
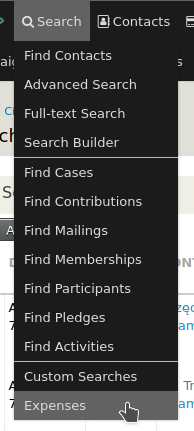
Searching for expenses
Go to Search > Expenses to search for epxenses.
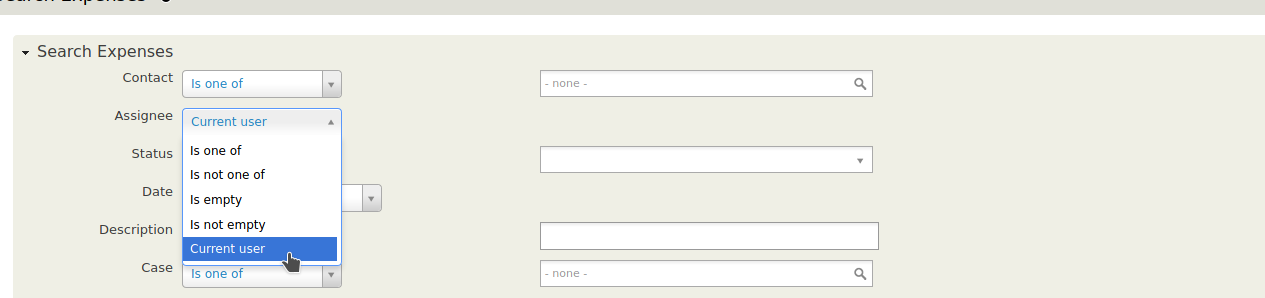
When you click on Search Expenses you can change the search criteria.

Finding expenses assigned to me
Go to Search > Expenses and change the search criteria and set Assignee to Current User. Press search, so that you will find all expenses assigned to your self.
Expenses on a case
It is also possible to add expenses to a case. To do this go to a case in CiviCRM and click on the tab Expenses. You can then see all the expenses attached to a case and you can add a new expense to the case.
Integration with other data processor and form processor
This extension integrates with the data processor extension. With the data processor integration you can easily create your own reports and dashlets.
This extension also integrates with the form processor extension. With the form processor integration you can create end points for forms coming from another website. For example a portal where volunteers submit their expenses.